Wednesday, December 18, 2013

DIY Pinch Pleat Curtains (with pompoms, naturally).

I recently made curtains for my daughter's room, and I'm a wee bit obsessed with how they turned out.
DIYCurtains 

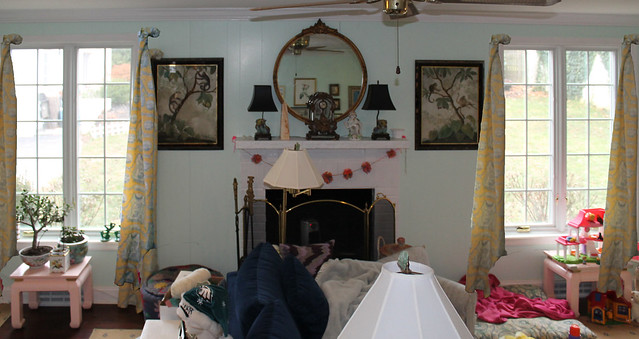
Here is a quick before and after to whet ya palate. Bam.
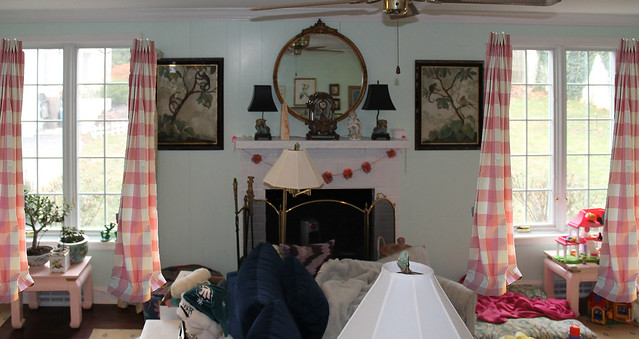
BAM!
2013-12-17 21.25.58

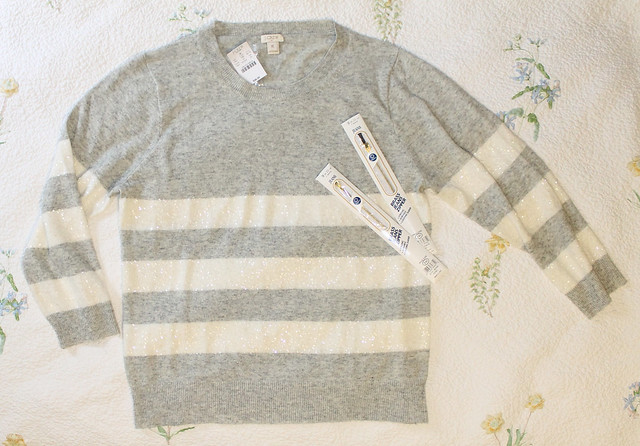
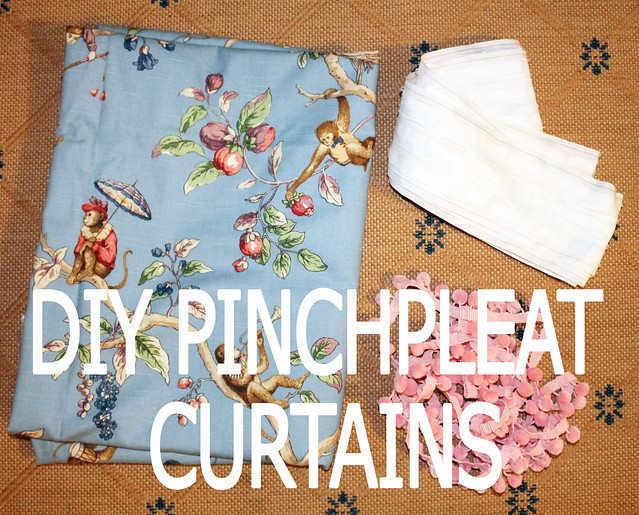
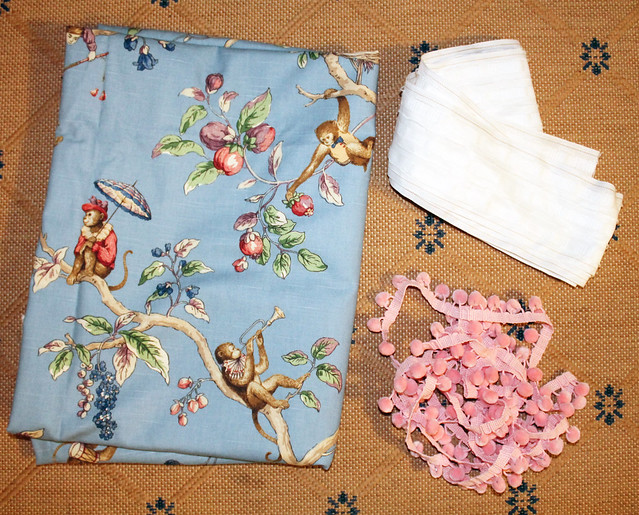
Now let's get down to brass tacks. In order to make pinch pleat curtains you need fabric, and pleating tape. Which isn't exactly tape, it's like a long strip of white fabric with strings running through it. 
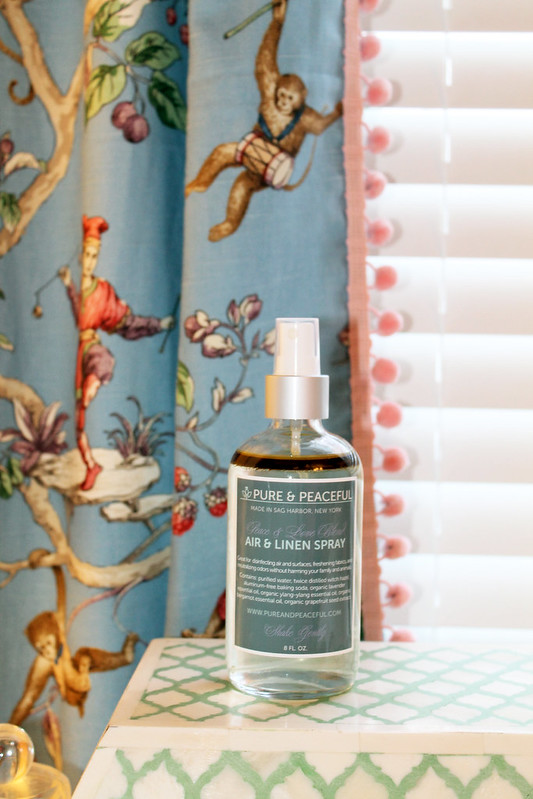
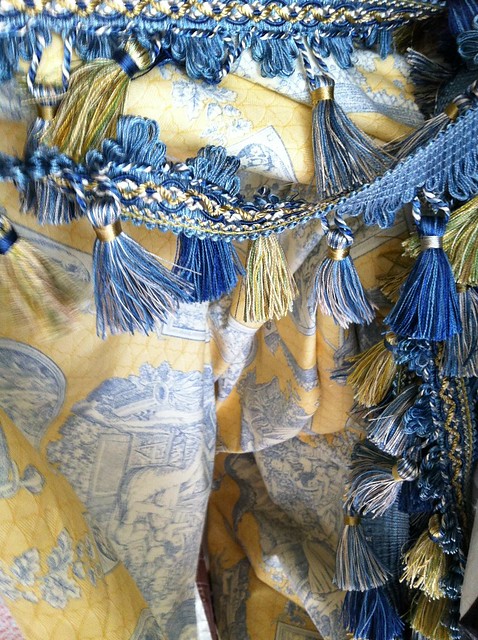
And pink pompoms, if you require pink pompoms in your life. 
2013-11-09 11.24.23

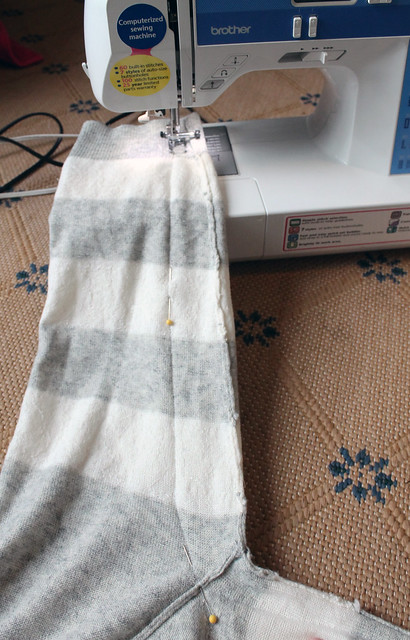
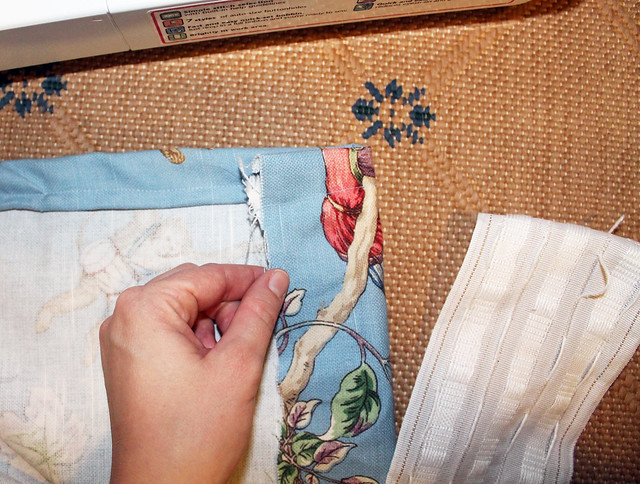
To finish the sides and bottom of the curtains, I did a simple fold-over. I left mine unlined, but if you want to line them you'd just stick a piece of lining in between your curtain fabric (where I'm pinching). I also didn't use a blind hem. I find blind hemming to be really difficult, and if you get your thread to match pretty well, you can't really see the stitch. 
2013-11-09 11.32.45 
 
You'll want to attach your pleating tape to the top of your curtain, which gives you an excuse to not sew the top before you do this. You're welcome. See how I'm saving you time here? 
2013-11-09 11.34.16

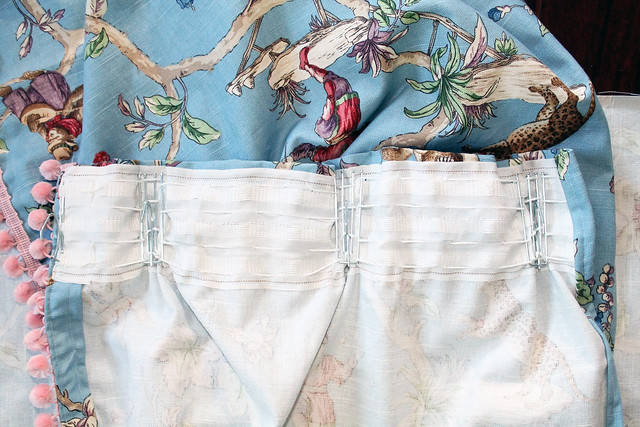
Pompoms go on last, and I just sew them right on top to hide the stitching. Again with the matching thread thing. 
2013-11-09 11.47.46 

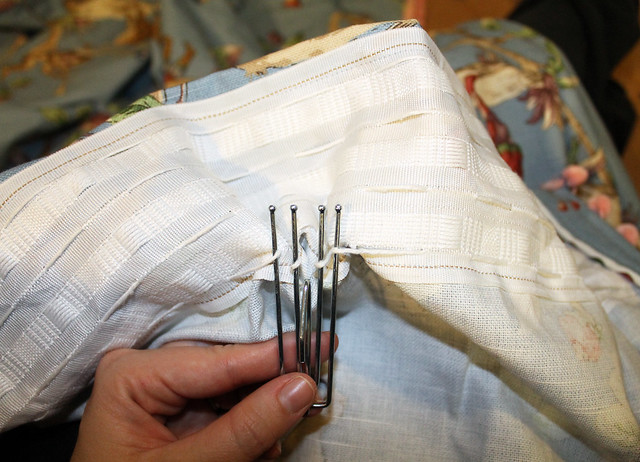
You'll need these metal do-dads, aka "pleater hooks". Space them about every 3 strings, or don't. You can do as many of these as you want, making it look super-pleaty, or not so pleaty. I used 4 pleater hooks per curtain, and I'd say I got a very middle-of-the-line-pleaty look.  
2013-11-09 11.58.14

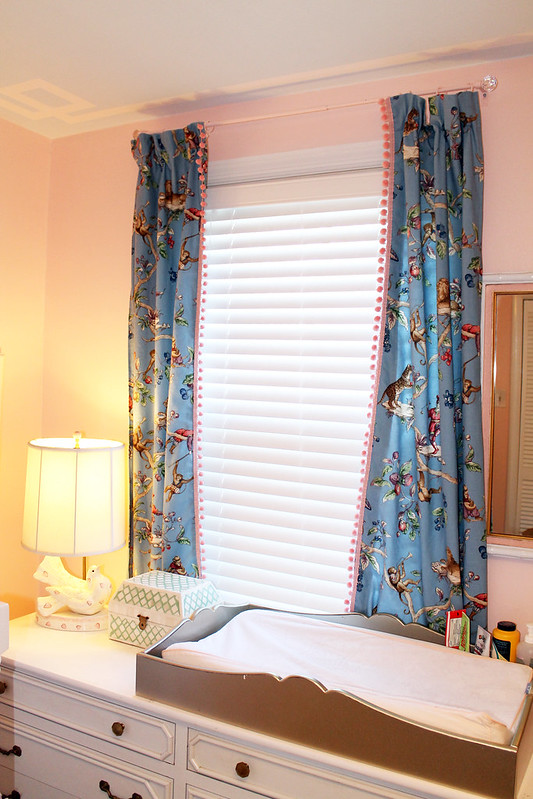
This is how it will look like apres-pleating.
2013-11-19 02.07.06 

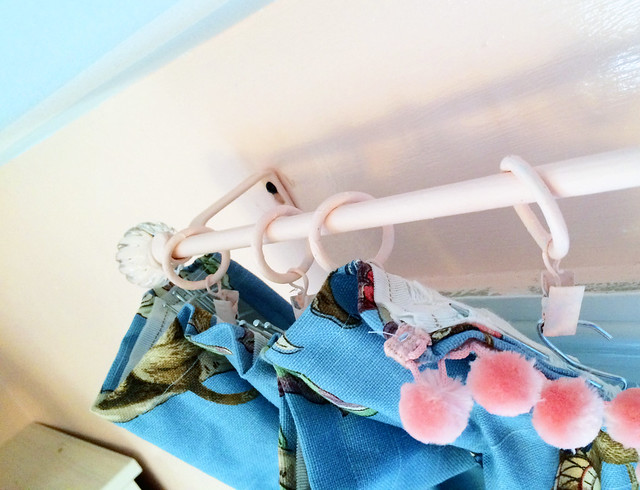
Then comes the best part! Hang em. 
2013-12-17 21.25.51 

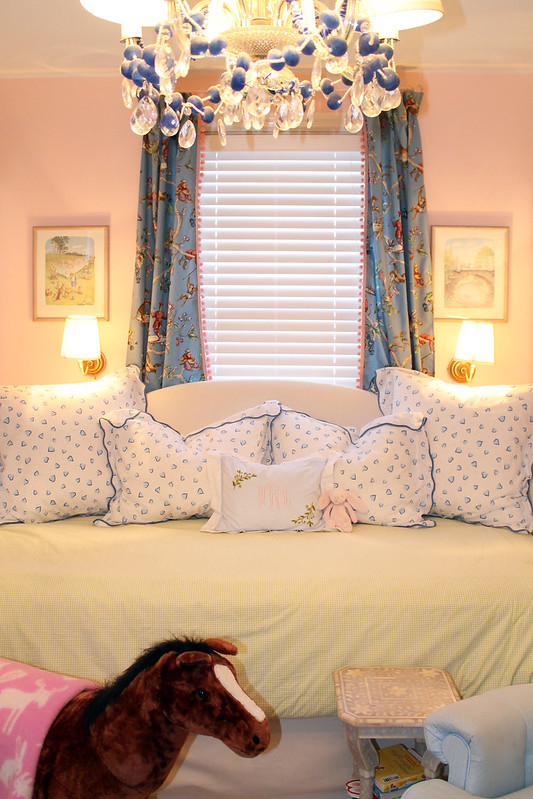
I used a simple rod and O-rings that I painted the same color as the wall.
image (2)
 2013-12-17 21.25.58

2013-12-17 21.28.36 

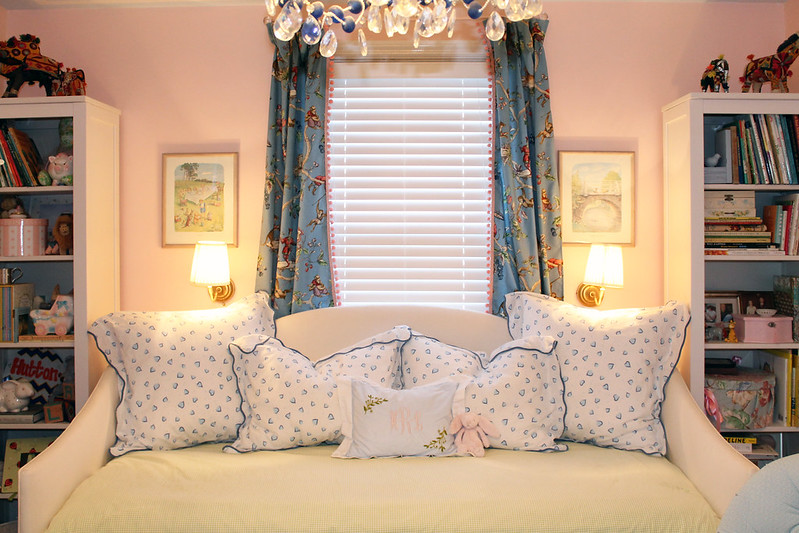
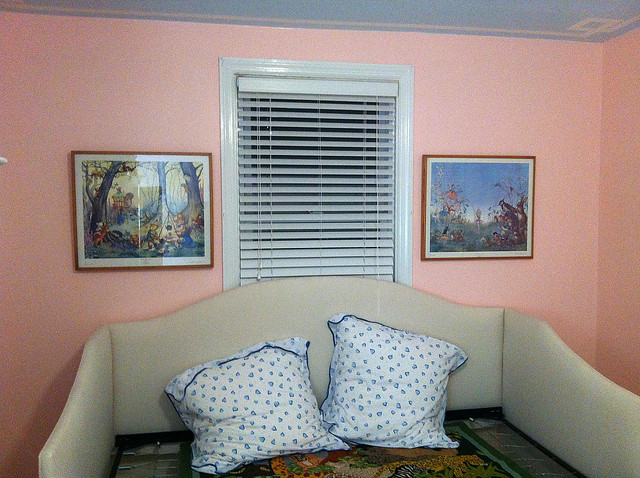
I am so happy with how they turned out. I really think they brighten up the whole room. 
2013-12-17 21.29.45 
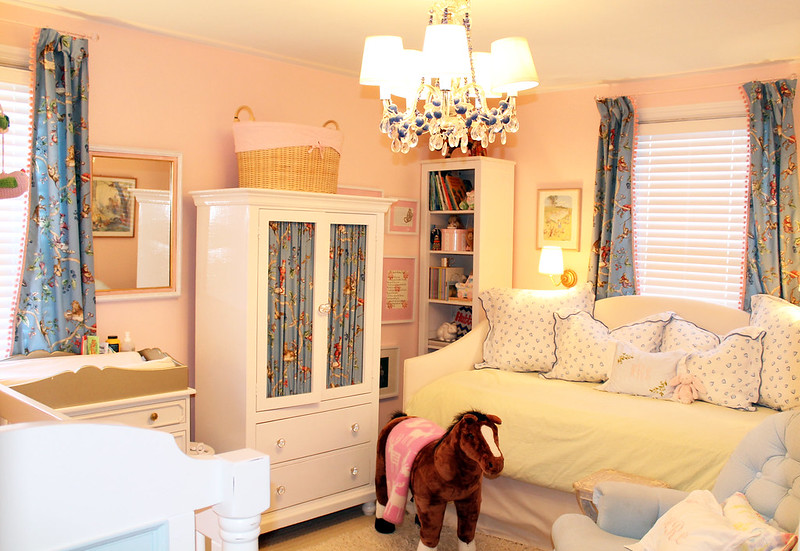
To see the other projects I did with this fabric, click here (armoire) and here (hamper revamper)

To enlist my curtain making skillz for your own home, click here!
->>

Monday, December 16, 2013

Pure & Peaceful: Air & Linen Spray

Shamir from Pure & Peaceful was sweet enough to send us a bottle of their best selling Air & Linen Spray.

It arrived in the cutest 100% recyclable packaging.
box

Each glass bottle (LOVE a good glass bottle) is filled with a handmade blend of essential oils and all natural & organic ingredients, so I had no hesitation using this around Lulu.
outofbox

The scent is just beyond. It smells like you brought a bouquet of fresh flowers into your home, and then took two hours to wash your floors with pure lemon. Which will never happen.

It's just the right amount of airy, sweet, clean, and a little sumin' sumin'.
shaken

It's definitely become a permanent fixture in our home. I've been spraying it in our bedrooms before we sleep, in the bathroom daily (essential oils are naturally anti-bacterial), and in the dryer. Needless to say, our house smells increds. 
airlinen
Shamir has offered Belladwella readers 25% OFF their first order of Air & Linen Spray (At checkout, enter the promo code "HOLIDAYLINENS"). 

There are a bunch to chose from: here

If your order is placed by THIS Friday (Dec. 20th) you will receive it before Christmas. 

(If you're not in a rush to have your home smelling like straight up heaven on the rocks, the promo code is good until January 2, 2014.)

Thanks for letting me test out this wonderful product, Shamir!
->>

Wednesday, December 11, 2013

Our holiday card... (and my favorite snail mail ever)

It's that time of year again! The time when you can't wait to check the mail because of all the cute holiday cards you'll be receiving. I just love it, and quite frankly I think there's nothing better.

This is the first year our little family has sent a card, so I wanted to share what we did.

We used TinyPrints for our cards. They were great to work with, fast, and the cards look great. They even printed our return address on the backs of the envelopes.
2013-12-10 23.03.19

Our square envelope requires two stamps (oops), and I got the idea to use different stamps from Jenny over at Little Green Notebook.
2013-12-10 23.03.12

Each card gets a wreath, cause I'm nice like that. And truth be told, I've used Pentel RSVP pens since high school, and I'm addicted. It's the only way to write, dahling.
2013-12-10 23.03.27

I'm a big fan of old school address books. I got this one years ago in Nantucket. It's by Chronicle Books, and you can find similar ones here.
2013-12-10 23.03.54
->>

Tuesday, December 10, 2013

New sponsor: Pure & Peaceful

Please join me in welcoming Pure & Peaceful as our newest sponsor.

Pure & Peaceful produces natural home-care products formulated and handcrafted right in Sag Harbor. Born out of a passion for health, wellness, and environmental sustainability, Pure & Peaceful products effectively clean your space and home while filling the air with fresh, therapeutic scents.

All products are made with organic, therapeutic-grade, high-quality essential oils. Pure & Peaceful products are all non-toxic and completely mineral and botanically-derived.


Shamir, the owner of Pure & Peaceful sent me some of her Air & Linen Spray for Little Ones which I can't wait to review here on the blog!
Please check out her little shop! Clickity click.
->>

Thursday, December 5, 2013

#tbt DIY: Serena & Lily Pondicherry Headboard for $100

This here is one of my favorites, and the one that's been all over Pinterest for the past two and a half years (specifically, the picture of Trevor using the jigsaw - sorry babe).

We desperately needed a headboard for our bedroom, and our budget back in June of 2011 was only around $100 for the project. Between Home Depot, and Jo-Ann Fabrics I was able to find everything I needed.
5861588639_3e2936bc34 

The great thing about this DIY is that you can choose any headboard shape you want, draw half of it, and use a big piece of paper to duplicate it. This way, even if you're a little off on the shape at least it will be symmetrical.
5861633237_f496c446e9 5862262390_a51f6d6bde_z

5845425021_16be8bc91f_z

To see the original post with full instructions on how to attach the batting, fabric, and brass nail heads, click here: Serena & Lily Pondicherry Headboard DIY.
2013-12-05 00.25.56

I may be thrifty with headboards, but not when it comes to sheets. I wouldn't trade my Schweitzer and Yves Delorme linens for anything in this world. They are heaven to sleep in. 
2013-12-05 00.27.18

We've switched up our bedside table situation since I originally posted this DIY. We now use my great grandmother's T. Anthony suitcases and my great grandfather's steamer trunk. 
2013-12-05 00.28.43

They are great for storage but not great for keeping things organized on top, so I added little boxes, and antique Chinese plates as coasters.
2013-12-05-00.28

The end! Hope you enjoyed this #tbt DIY, brought to you by the cat who would not go away.
2013-12-05-00.29
->>

Wednesday, December 4, 2013

Buffalo check is back, baby.

I found this fabulous Thibaut fabric at the consignment store for only $22. It's circa 2001, and a classic. If anyone did toile justice in it's heyday, it was Thibaut.

I thought it would be perfect for our family room curtains. I even found this gorgeous trim on eBay.
wid8

Well, since that time I did an e-decor for a client and used Scalamandre pink buffalo check and CANT GET IT OUT OF MY HEAD. So I decided to play around with it in photoshop.

This is how the Thibaut toile will look. Eh. And excuse the mess.
curtains1

But oh my god. Look at the check. I love this so hard it hurts. 
  curtains2


This puts me in a pickle, and I might need to rethink things in this room. Scalamandre is not not not in our budget for this room (in fact, this room has no budget because it's "done"... yeah right). If we even go here at all, I'm thinking about DIY-ing these... 

What do you guys think? Which ones do you like better?
->>

New sponsor: Pedalogical

A big welcome to Belladwella's newest sponsor, Pedalogical! 

Pedalogical3

Justine Haemmerli is the lady behind Pedalogical. Before founding Pedalogical, she worked as a public school teacher, administrator, consultant, and teacher educator.

Justine's passion is helping clients to become "unstuck;" she works with folks who want to make changes in their lives, and get closer to what matters to them - whether they are changing jobs, creating a personal strategic plan, getting used to life with a new baby, or looking to start a new life chapter.

Justine helps clients to see that there are so many more options available to us than we are normally able to even notice; inspired by the folks she works with, Justine has explored her own myriad of options, and become a Reiki Practitioner, started a blog on civic engagement, become a non-profit board member, and started a real estate investment company. As she continues to coach, she is delighted and curious to see what transitions, new steps, and courageous & inventive projects await her clients.

Justine's message and passion align with the core values at Belladwella, and we welcome her with open arms! Please join me in supporting my sponsors, as they are the ones that support me.

What Pedalogical service is best for you? Find out here: get "unstuck" today!

  Pedalogical2
->>

Tuesday, December 3, 2013

DIY J. Crew zipper sweater

Raise your hand if you wanted any variation of this zipper sweater from J. Crew this fall.

I thought so. I wanted it too, but thought it best to make my own, because DIY.
e77a526377b385c23bb07f50113476a4

I bought the 9 inch white zippers for jeans from JoAnn Fabrics. These will run you about $7 each unless you have the JoAnn app, which is amazing and literally gives you 40% off everything always. 
1285af2e4fa111e390640e89ad1ea68a_6

Then I found my victim at the J. Crew outlet for around $20. It was a million % off the original price, and an XL which was lucky. You know whats worse than a post-baby-tight-sweater? Not much.
sweater3 - Copy

Cut up the side right next to the seam. The cut should be about the same length as your zipper (a bit shorter). Then pin one side of the zipper to the front side of your sweater, then reverse it so you can sew. 

If you have trouble with reading that last direction, lets try this one. With your sweater right side out, put the zipper inside, fold your sweater into the zipper (also facing out - as in, the way it'll look when you're wearing it) and pin. 

sweater5

I also took in the sleeves because I like to show off my muscles.
sweater4 - Copy

Then BAM! Bad mirror selfies!
sweater2 - Copy

And another one, from the side this time. I am super happs with how it turned out, and I will be rocking it this Christmas season, and bragging that it only cost me $28.40. Na na na na boo boo.
sweater1 - Copy
->>