
Let me preface this by saying there are some excellent DIY Roman Shade tutorials on Pinterest (click here to see them all), however they were all a little too much work. I'm all for doing as little work as possible.
So I made up my own DIY tutorial. This is not a working roman shade, meaning you can't make it go up and down. It's just for looks.

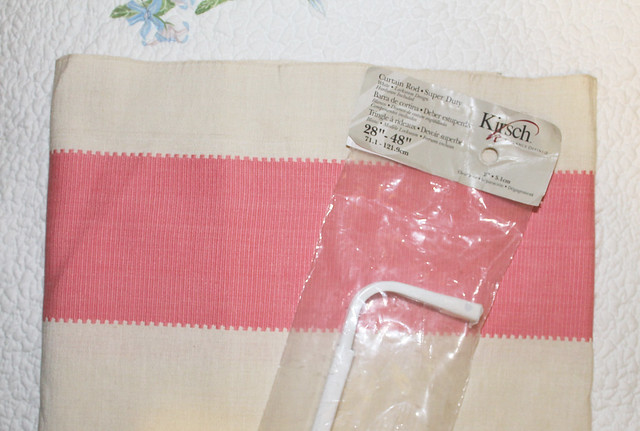
First, you'll need fabric and a cheap rod. I got my rod at JoAnn Fabrics for around $5. The fabric is one that I had ordered for a client to re-cover her sofa, and I completely fell in love with it, and jumped at the chance to use it for my bathroom makeover.
I highly recommend using a striped fabric. It makes it really easy to make straight cuts and line up for sewing.
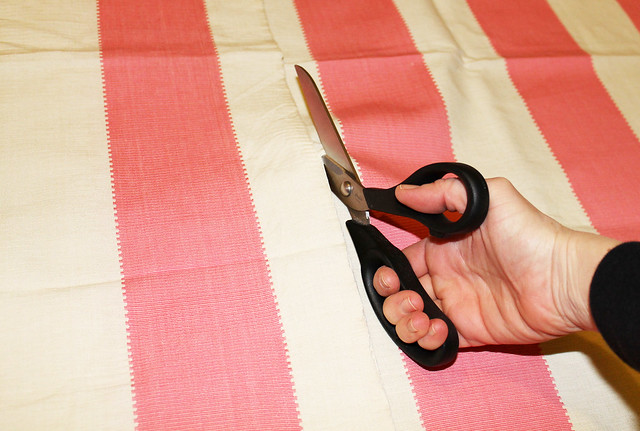
I suggest measuring the width of your window, and then adding on an inch on either side so you have enough to fold over, like in the picture below.

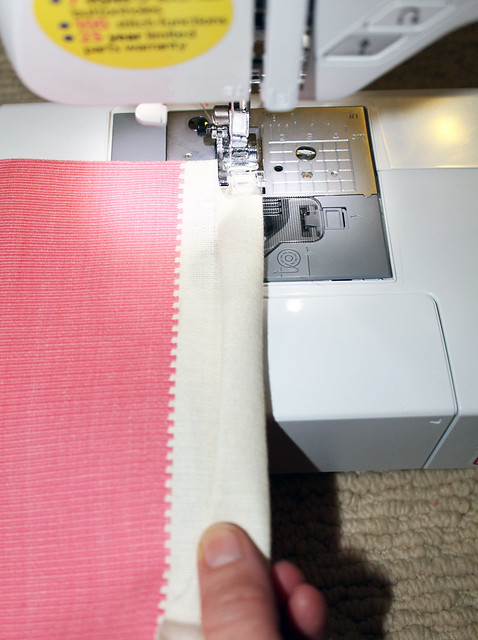
Now, since this shade isn't going anywhere you can just fold it over once. Don't worry about the raw edge because you won't see it. Sew the sides first. You could even use hemming tape for this, and make it a no-sew shade.
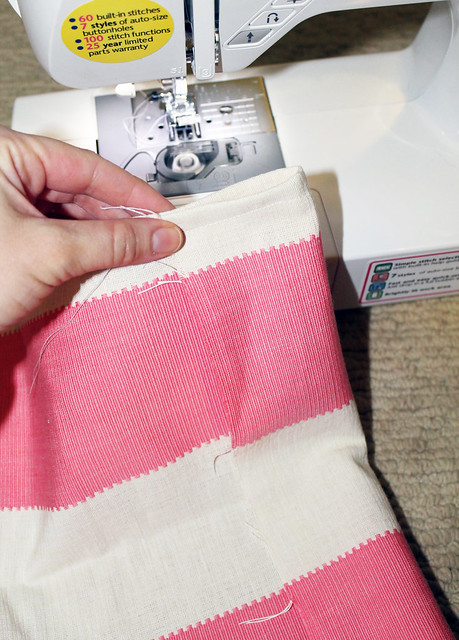
Sew the top by folding over a bigger portion of your fabric. You want enough room so that you can fit your rod through it. That's what she said.
Now Here's the fun part. Did I say fun? I meant tricky.
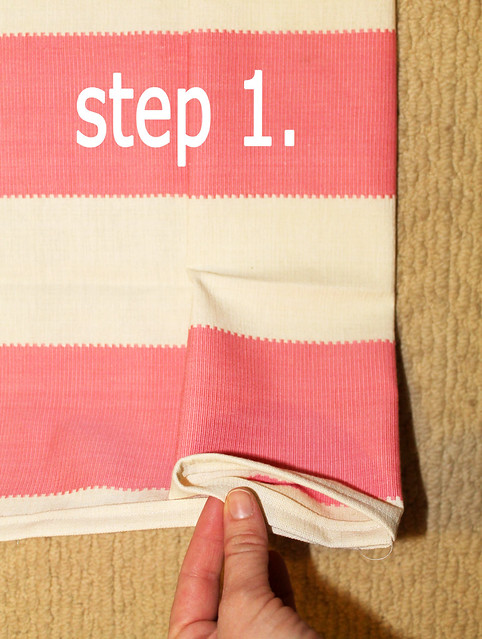
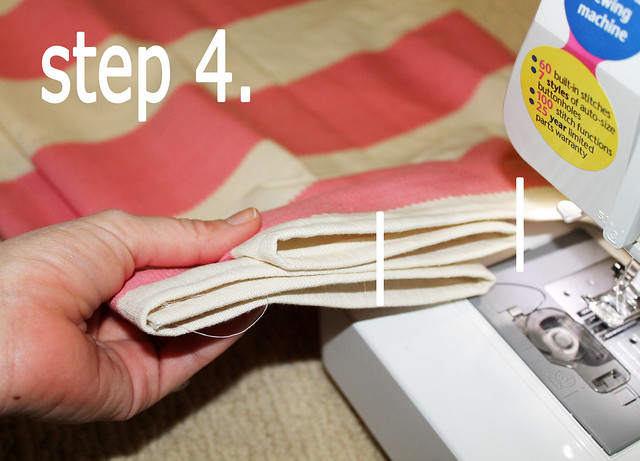
Lay out your fabric on the floor, wrong side up. Meaning all the raw and icky edges that you don't want to see are facing up from the floor. The bottom part of the shade is the only part that you haven't sewn yet (cause you've sewn the sides and the top, right?). You want to fold the bottom onto itself TWICE. So you are kind of "rolling it up" like a fruit roll up.
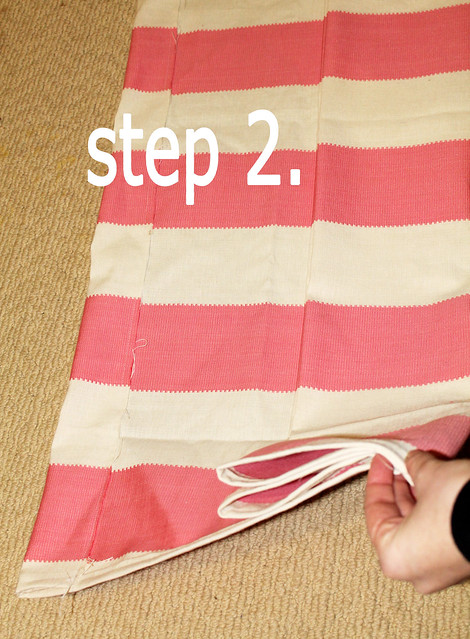
Next, fold that previous fold under itself and then back up. Like you are making a paper fan in elementary school.
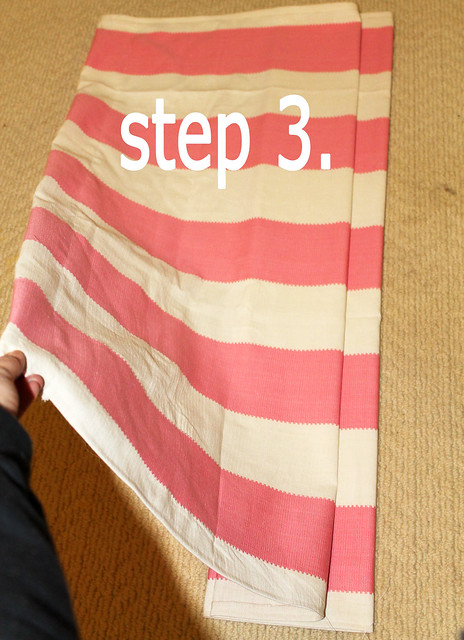
Then, carefully flip your fabric over so that it's RIGHT side up. Meaning all the good stuff is facing up now. and pull the two "layers" apart, just a tad. I pulled my bottom layer about an inch away from the top layer.
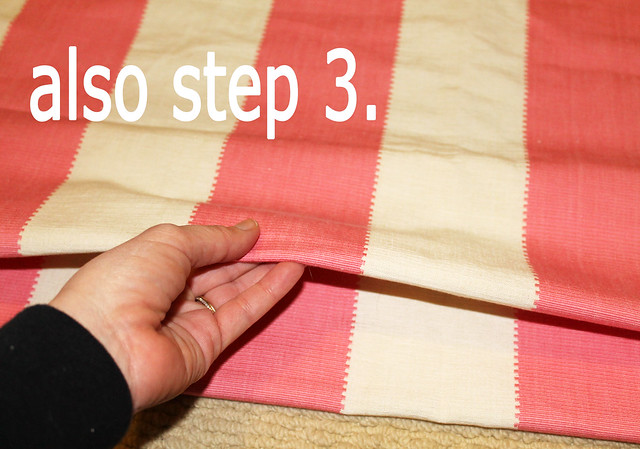
Next, you'll want to pin your "layers" or hold on for dear life, as you just sew the top two inches of ALL the layers together. I added two white lines the the picture below of where you need to sew.
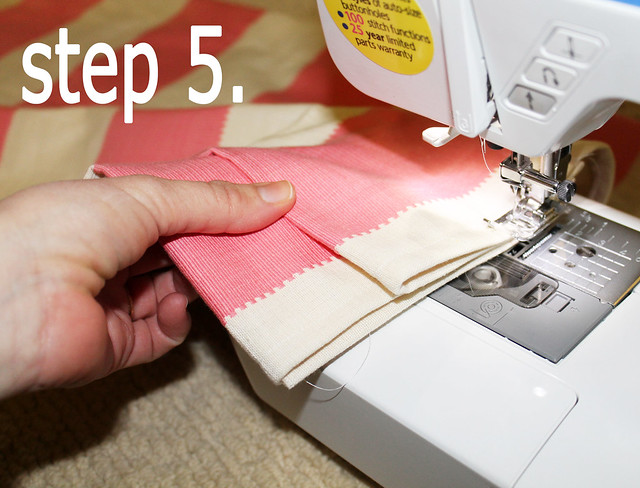
Step 5 is me doing what I just told you to do in step 4. I don't really know why there's a step 5 actually.
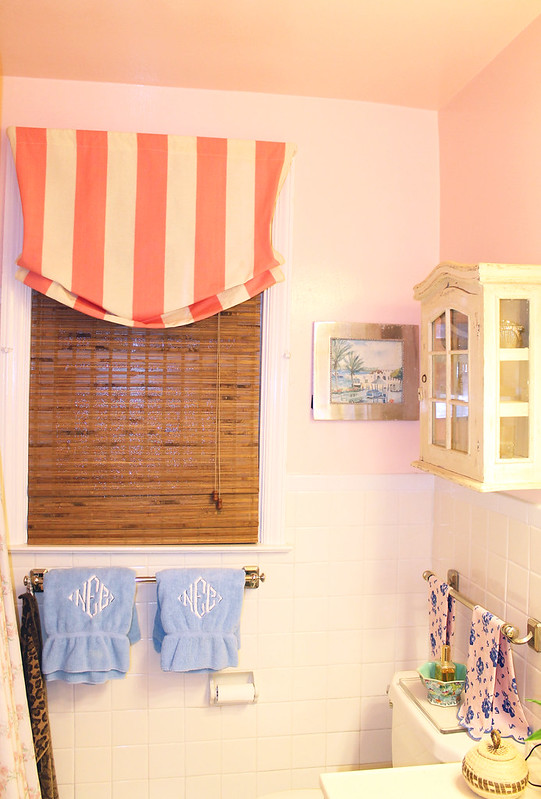
Final step! Hang that ish! The fabric will drape a little bit in the center.
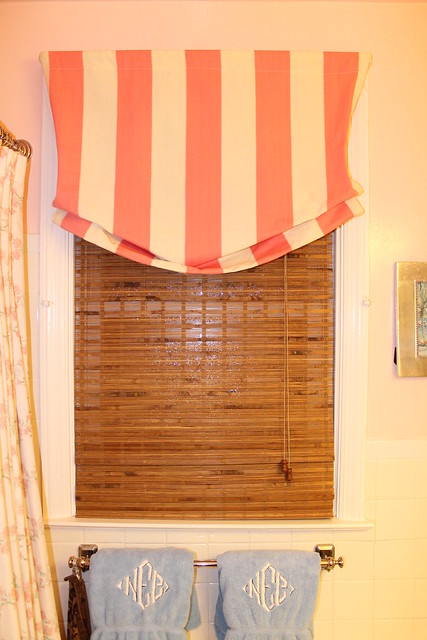
The bamboo shade is from Overstock and cost $26. It's the easiest shade I've ever installed. It's just two brackets, two washers, and boom you're done.
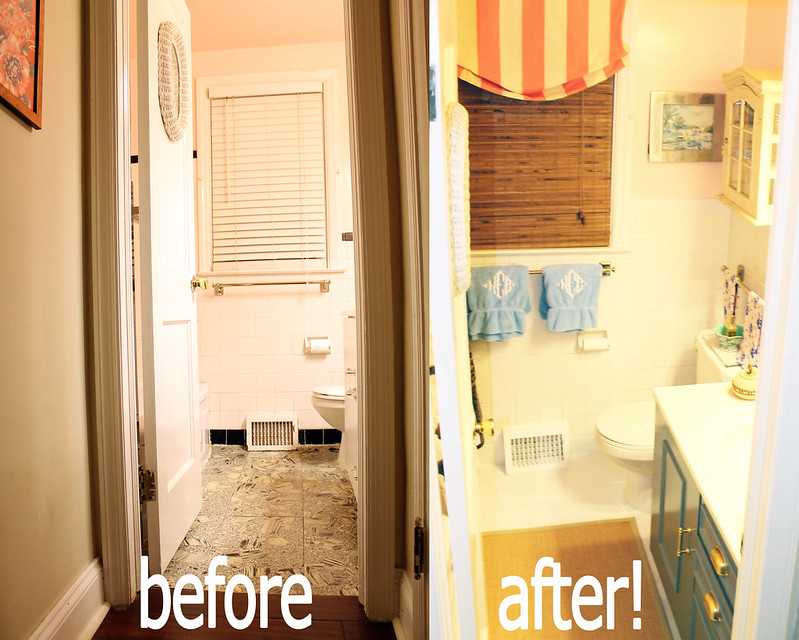
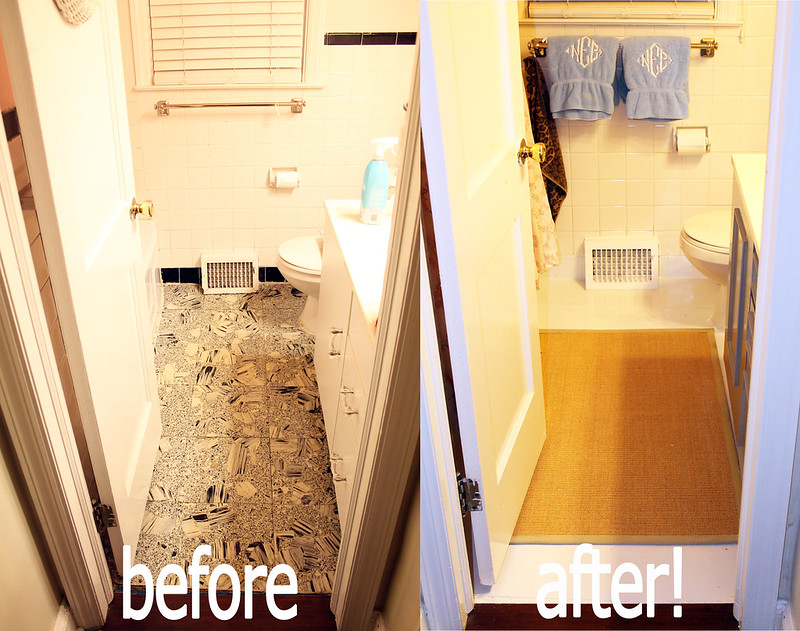
We repainted the walls Fond Memory by Ben Moore. It's got warmer, more brown undertones than Marry Me, which has black undertones and feels very cool. Marry Me was great when the tile was black, but felt way too cold as we started to re-do the bathroom.
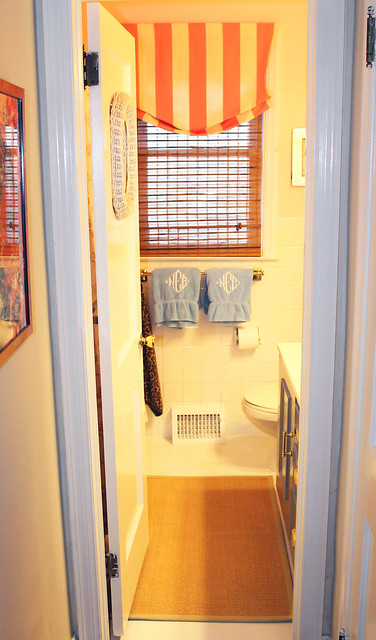
We also (read: my husband also) repainted the ceiling in Fond Memory. It's amazing how much larger the bathroom feels now that there's not that break between pink walls and a stark white ceiling.
I am anti-ceiling paint, in case you haven't figured that out by now. Check out Lulu's ceiling in this post.
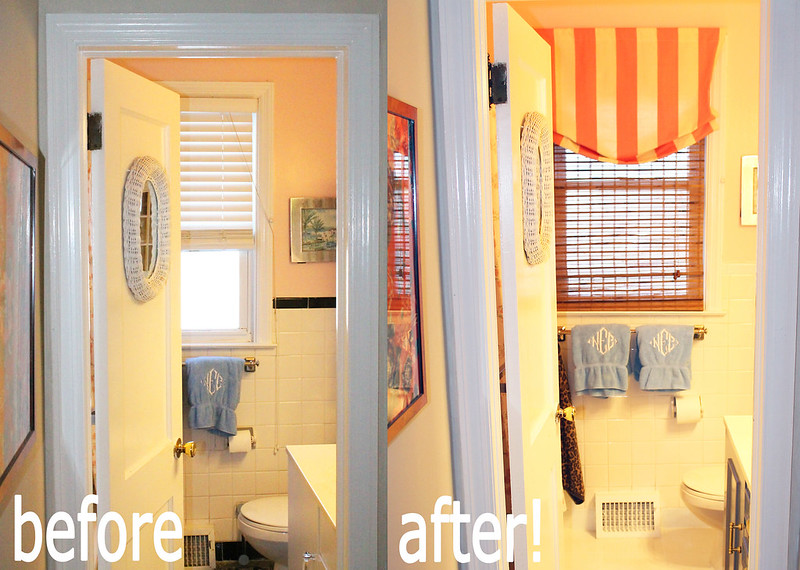
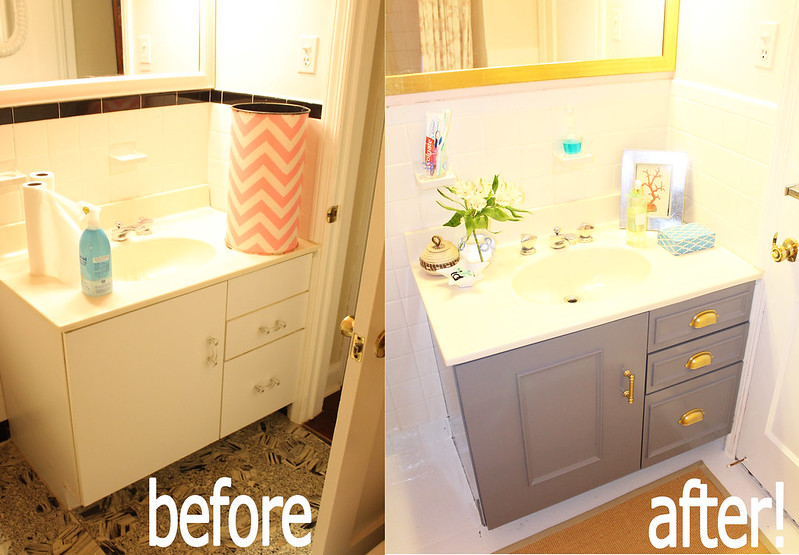
I couldn't be happier with how this turned out. All in all, it took about a week, and including all the paint, shade, fabric, hardware and materials it cost us $121.
I would love to hear what you think!
If you're feeling inspired, but need some help, I'm for hire! Click here to book a free consultation!
Wow! What a make-over!!!! Looks great! I can't believe you spent barely anything!
ReplyDeleteLove the Roman shade and the tutorial!!! I wish I could sew!!! (Should I attempt the no sew version!?)