
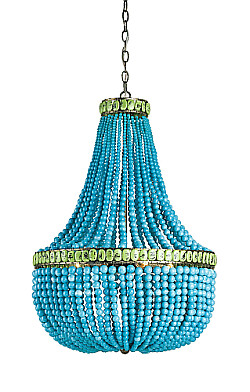
Here's why this whole thing started. I love this chandelier, but it's insanely expensive.
A while back I posted about this genius woman who made a chandelier out of party beads. See the post here: di-yoslef beaded chandelier. Cheap, easy, my kind of thing.
Mine turned out way different, because we actually needed a functioning light, so we used the bones of the original light hanging in the room.
The beauty of this project is that you could really do it with anything... and if you don't have the luxury of already having the awful looking spider thing like we did, you'll need some a dis:
2. jewelry wire
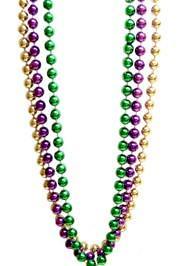
3. party beads
4. cheap hanging lamp - one hanging by a chain will work best if you're looking to attach quilting hoops to it
The whole thing should cost you under $100.
The whole thing should cost you under $100.
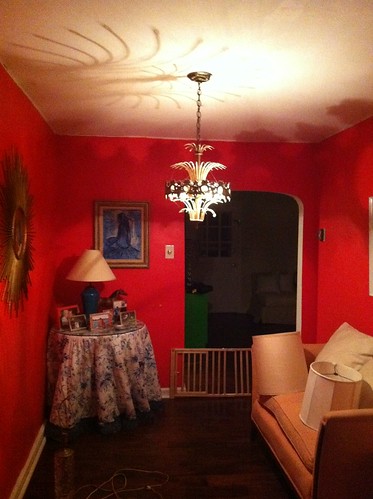
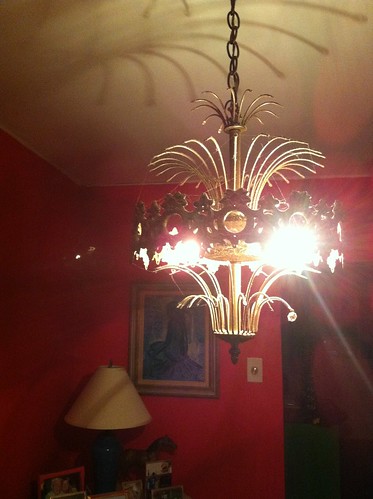
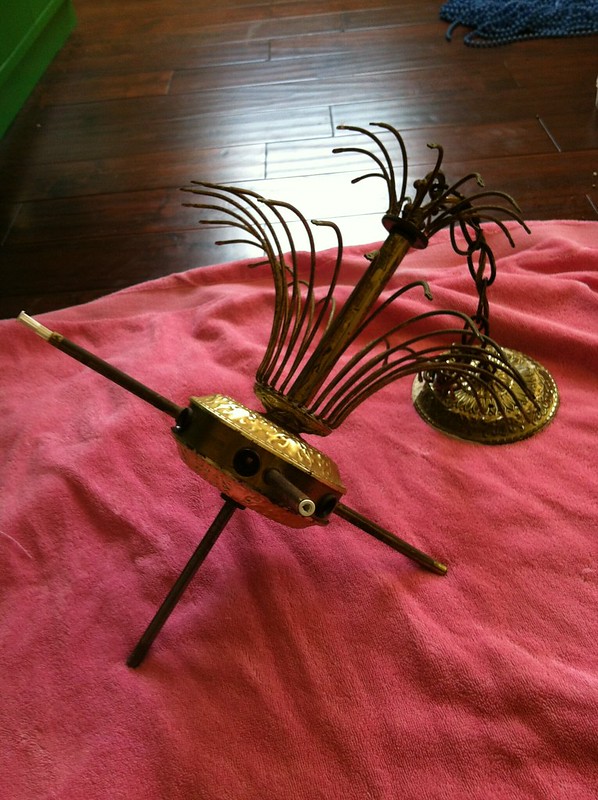
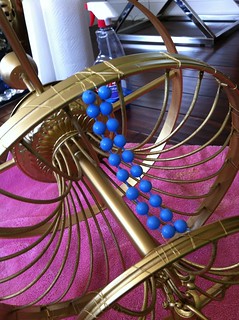
and ahhrgggghh how awful is this? Like a metal spider on acid with delusions of grandeur (check the shadow). Originally it wasn't that ugly. It had all these crystals on it, which I stole and used for the other chandelier I made. Nothing goes to waste here. only problem was for like a year if you looked at it funny it would try to poke your eye out when you walked by.
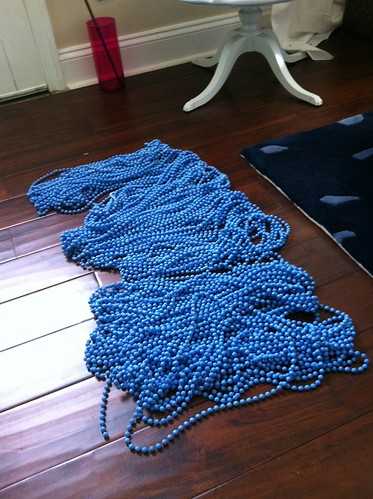
I started by having my husband spray paint the party beads Rustoleum's Spa Blue. I got mine the week after St. Patty's day on sale at Joann Fabrics - I think somewhere around 50 cents for a 3 pack.
here's the monster in the flesh, helpless and pissed off it had to move after 60 years.
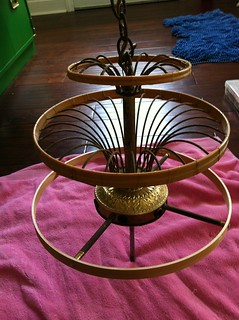
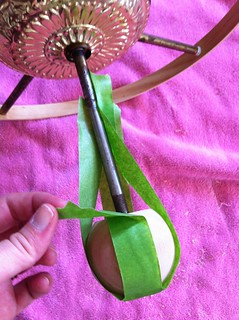
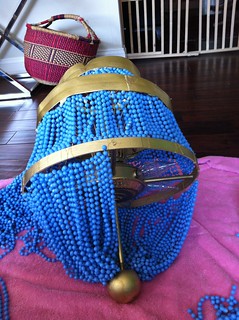
The inside of these quilting hoops (12 inch, 10 inch and 7 inch, all from Joann Fabrics and about $20 total) fit perfectly around the original chandelier, which was weird. The first one was screwed on, the next two I had to attach with wire.


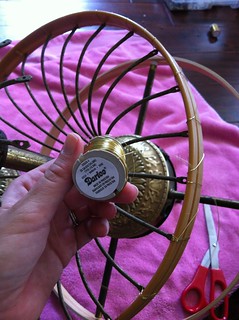
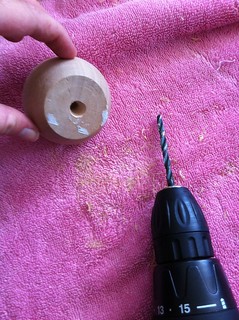
Screwin' balls. The bottom needed some type of anchor, so I got one of those wood craft balls at Joann and put a hole in it, then gorilla glued it onto the base.
Husband doing more spray painting. The man is a saint.

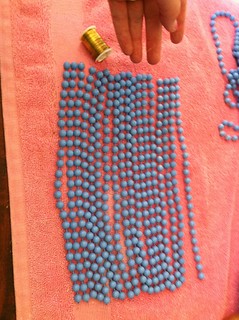
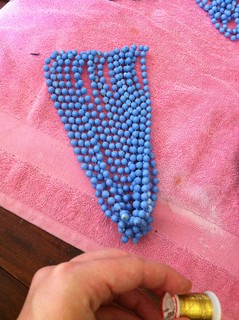
I cut the beads in bundles, and strung them together with the wire at the top and bottom, then attached them to the quilt hoops with gold jewelry wire, so if you see it it's not the end of the world. The bottom row was bundled together so that it would all mush and fit around the ball.
stringing the beads on the hoops... I'd like to thank 18 hours of Dawson's Creek for getting me through this.
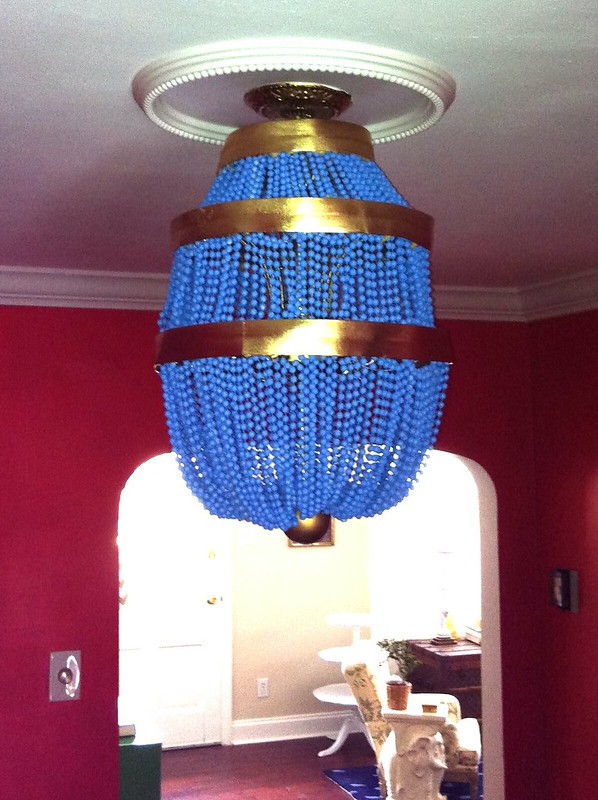
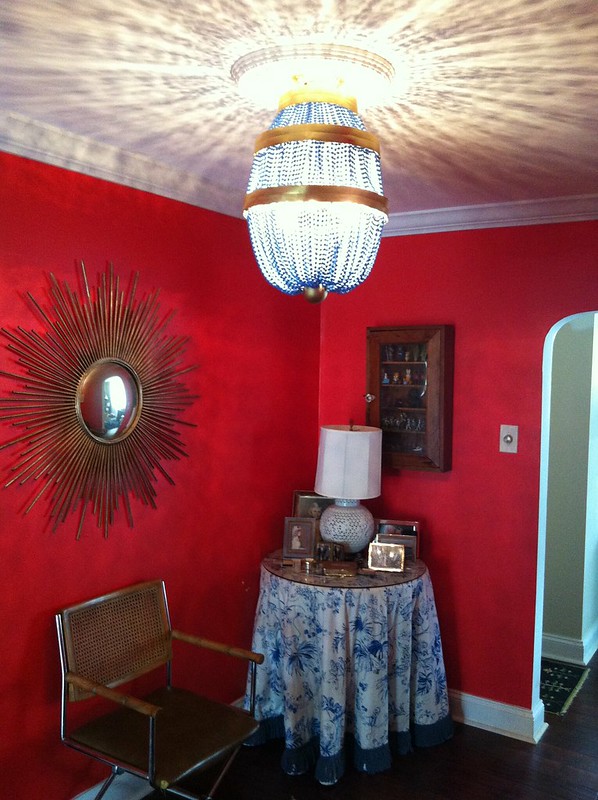
finished and hung!
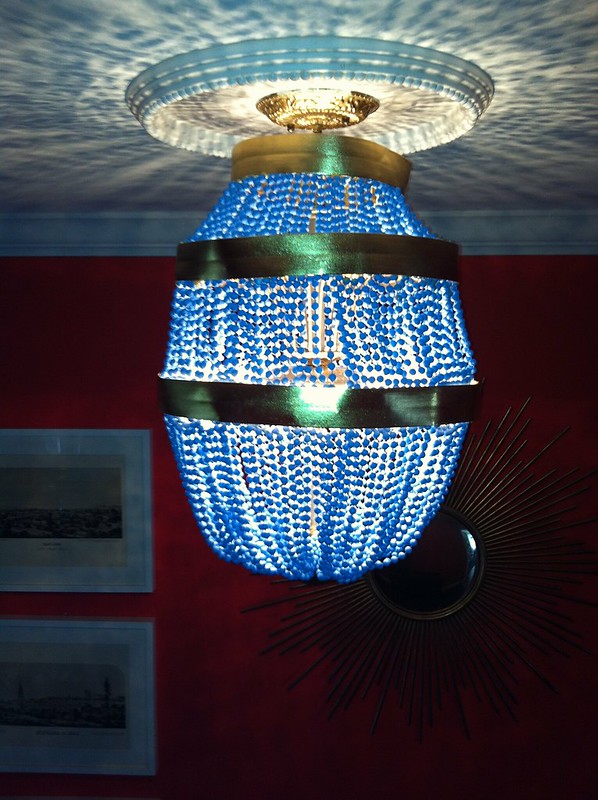
lit up
this was truly a labor of love and I'm so happy with the way it turned out. Just goes to show you can (sometimes successfully) re-use old crap.
Can't wait until the room is repainted.... It's going to POP once we paint the dining room/hallway thing the living room color (Muslin, by Benjamin Moore - I'm obsessed). POP I tell you.
LOVE IT...love the light on the ceiling....supa swanky
ReplyDeleteloves
ReplyDelete